This week I had the extreme privilege to get a lesson in food photography from Ryan Matthew Smith, the principal photographer for Modernist Cuisine. We recreated a few shots from the book and Ryan explained some of the techniques he used to create those jaw-dropping photos. In this article, I’ll give you some of Ryan’s best tips and tricks for shooting food in this style. We’ll cover the lighting setup for each shot, talk about the equipment that Ryan uses, and even look at some at-home alternatives. Finally, as a reward for reading all the way through, you can watch gelatin bounce in extreme slow motion :-) In Part 2 (coming soon), we’ll walk through a set of steps in Photoshop to pull out the hyper-real detail and lighting that make Modernist Cuisine’s food seem to jump off the page.
Photo Gear
Of course, we can’t talk about photography without talking about gear. All of the shots in this article used the following set of gear. Although the list of equipment used to create the book is likely much longer, I got the impression that this was the go-to stuff for the majority of the work. Unfortunately for the rest of us, the world’s best food photography isn’t cheap. However, I’ve tried to round up some budget-friendly alternatives to the big-ticket items.
| Modernist Cuisine Gear | Budget-Friendly Alternatives |
|
2 x Broncolor Grafit A4 RFS 110 V 120 V 3200 watt Second Power Pack – $11,349.95 ea. |
Use a monolight or another self-powered off-camera flash – no external power pack required |
|
2 x Broncolor Pulso G 3200 WS Lamphead – $3,039.95 ea. |
PBL SL300 Studio Flash Strobe – 300w Photography Monolight – $115 [Note: Ryan recommends watching Craigslist for deals on used monolights and strobes] |
| 2x Broncolor Honeycomb Grid – $569.95 ea. | Strobist has a great article on DIY Gridspots made from cardboard. A cheap but effective alternative! |
|
Canon EOS 5D Mark II – $2,708.94 (body only) Canon EF 24-105mm f/4 L IS USM Lens – $1179 |
Nikon d7000 – $1349 (my not-quite-budget choice) with a 50mm Prime Lens – $175 Canon Rebel XS with kit lens – $554 (entry-level, but a huge step up from point-and-shoot) |
| Flash Sync Cable – $7.49 | Doesn’t get much cheaper than this. But, if you’re looking for wireless flash triggers, the CowboyStudio hotshoe triggers to a great job for the price ($26) |
| 1/2” Clear Acrylic Sheet 24”x36” | Here’s a 12”x24” version on Amazon for $33.20. You don’t need 1/2” of thickness since the sheet is much smaller. |
| 1/8” and 1/4 Clear acrylic, sprayed black 24”x36” | You can snag a 12”x24” piece of black acrylic from TAP Plastics for around $25. |
| Black Velvet Fabric Panel – $39.95 | Black velvet curtain set – $18.19 |
| 2 x Sawhorse – $80 | Grab 2 chairs |
| Ladder | Really? |
1. Heirloom Tomato
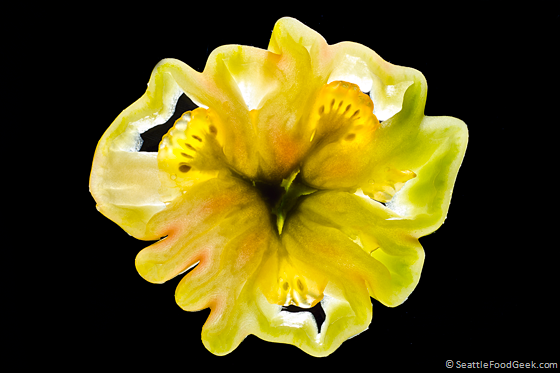
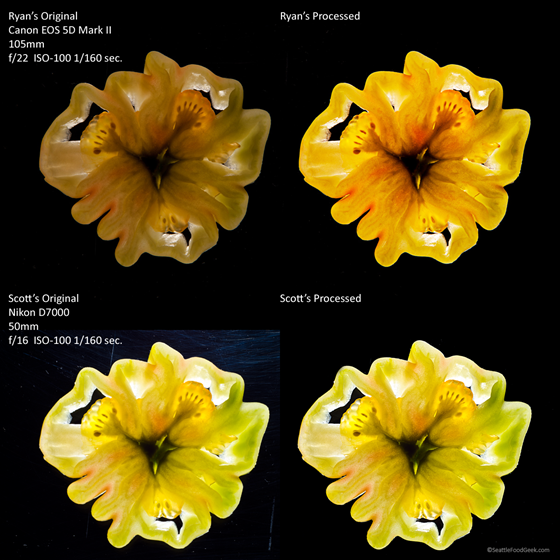
Although this isn’t explicitly a replica shot from the book, it would fit right in. We took a beautifully weird, yellow heirloom tomato (from Whole Foods) and sliced off a 1/2” section from the middle. We shot the image both using Ryan’s camera and my own, but with identical lighting setups. Ryan and I both did some Photoshop cleanup, the results of which you can see in the right-hand images above. [Note: Ryan is a Photoshop guru. To learn a few of his tips, check back for Part 2.] The purpose of posting these images side-by side is to illustrate that different cameras will yield vastly different images.
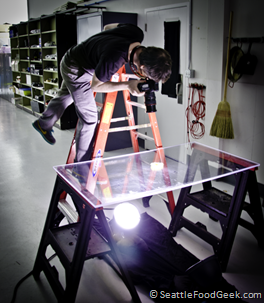 Here’s an image showing the setup of the shot. Ryan placed a sheet of 1/2” clear acrylic across a pair of sawhorses. He then covered the floor with a piece of black fabric. He equipped his two monstrous strobes with honeycomb grids and pointed them up at the tomato slice at a 45-degree angle from the floor. Then, a few steps up a ladder gave us just the right angle to shoot straight down on the subject.
2. Prosciutto
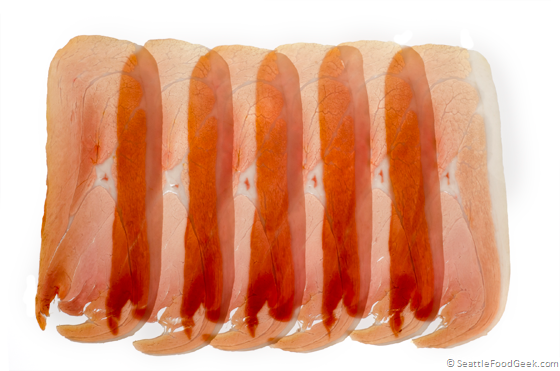
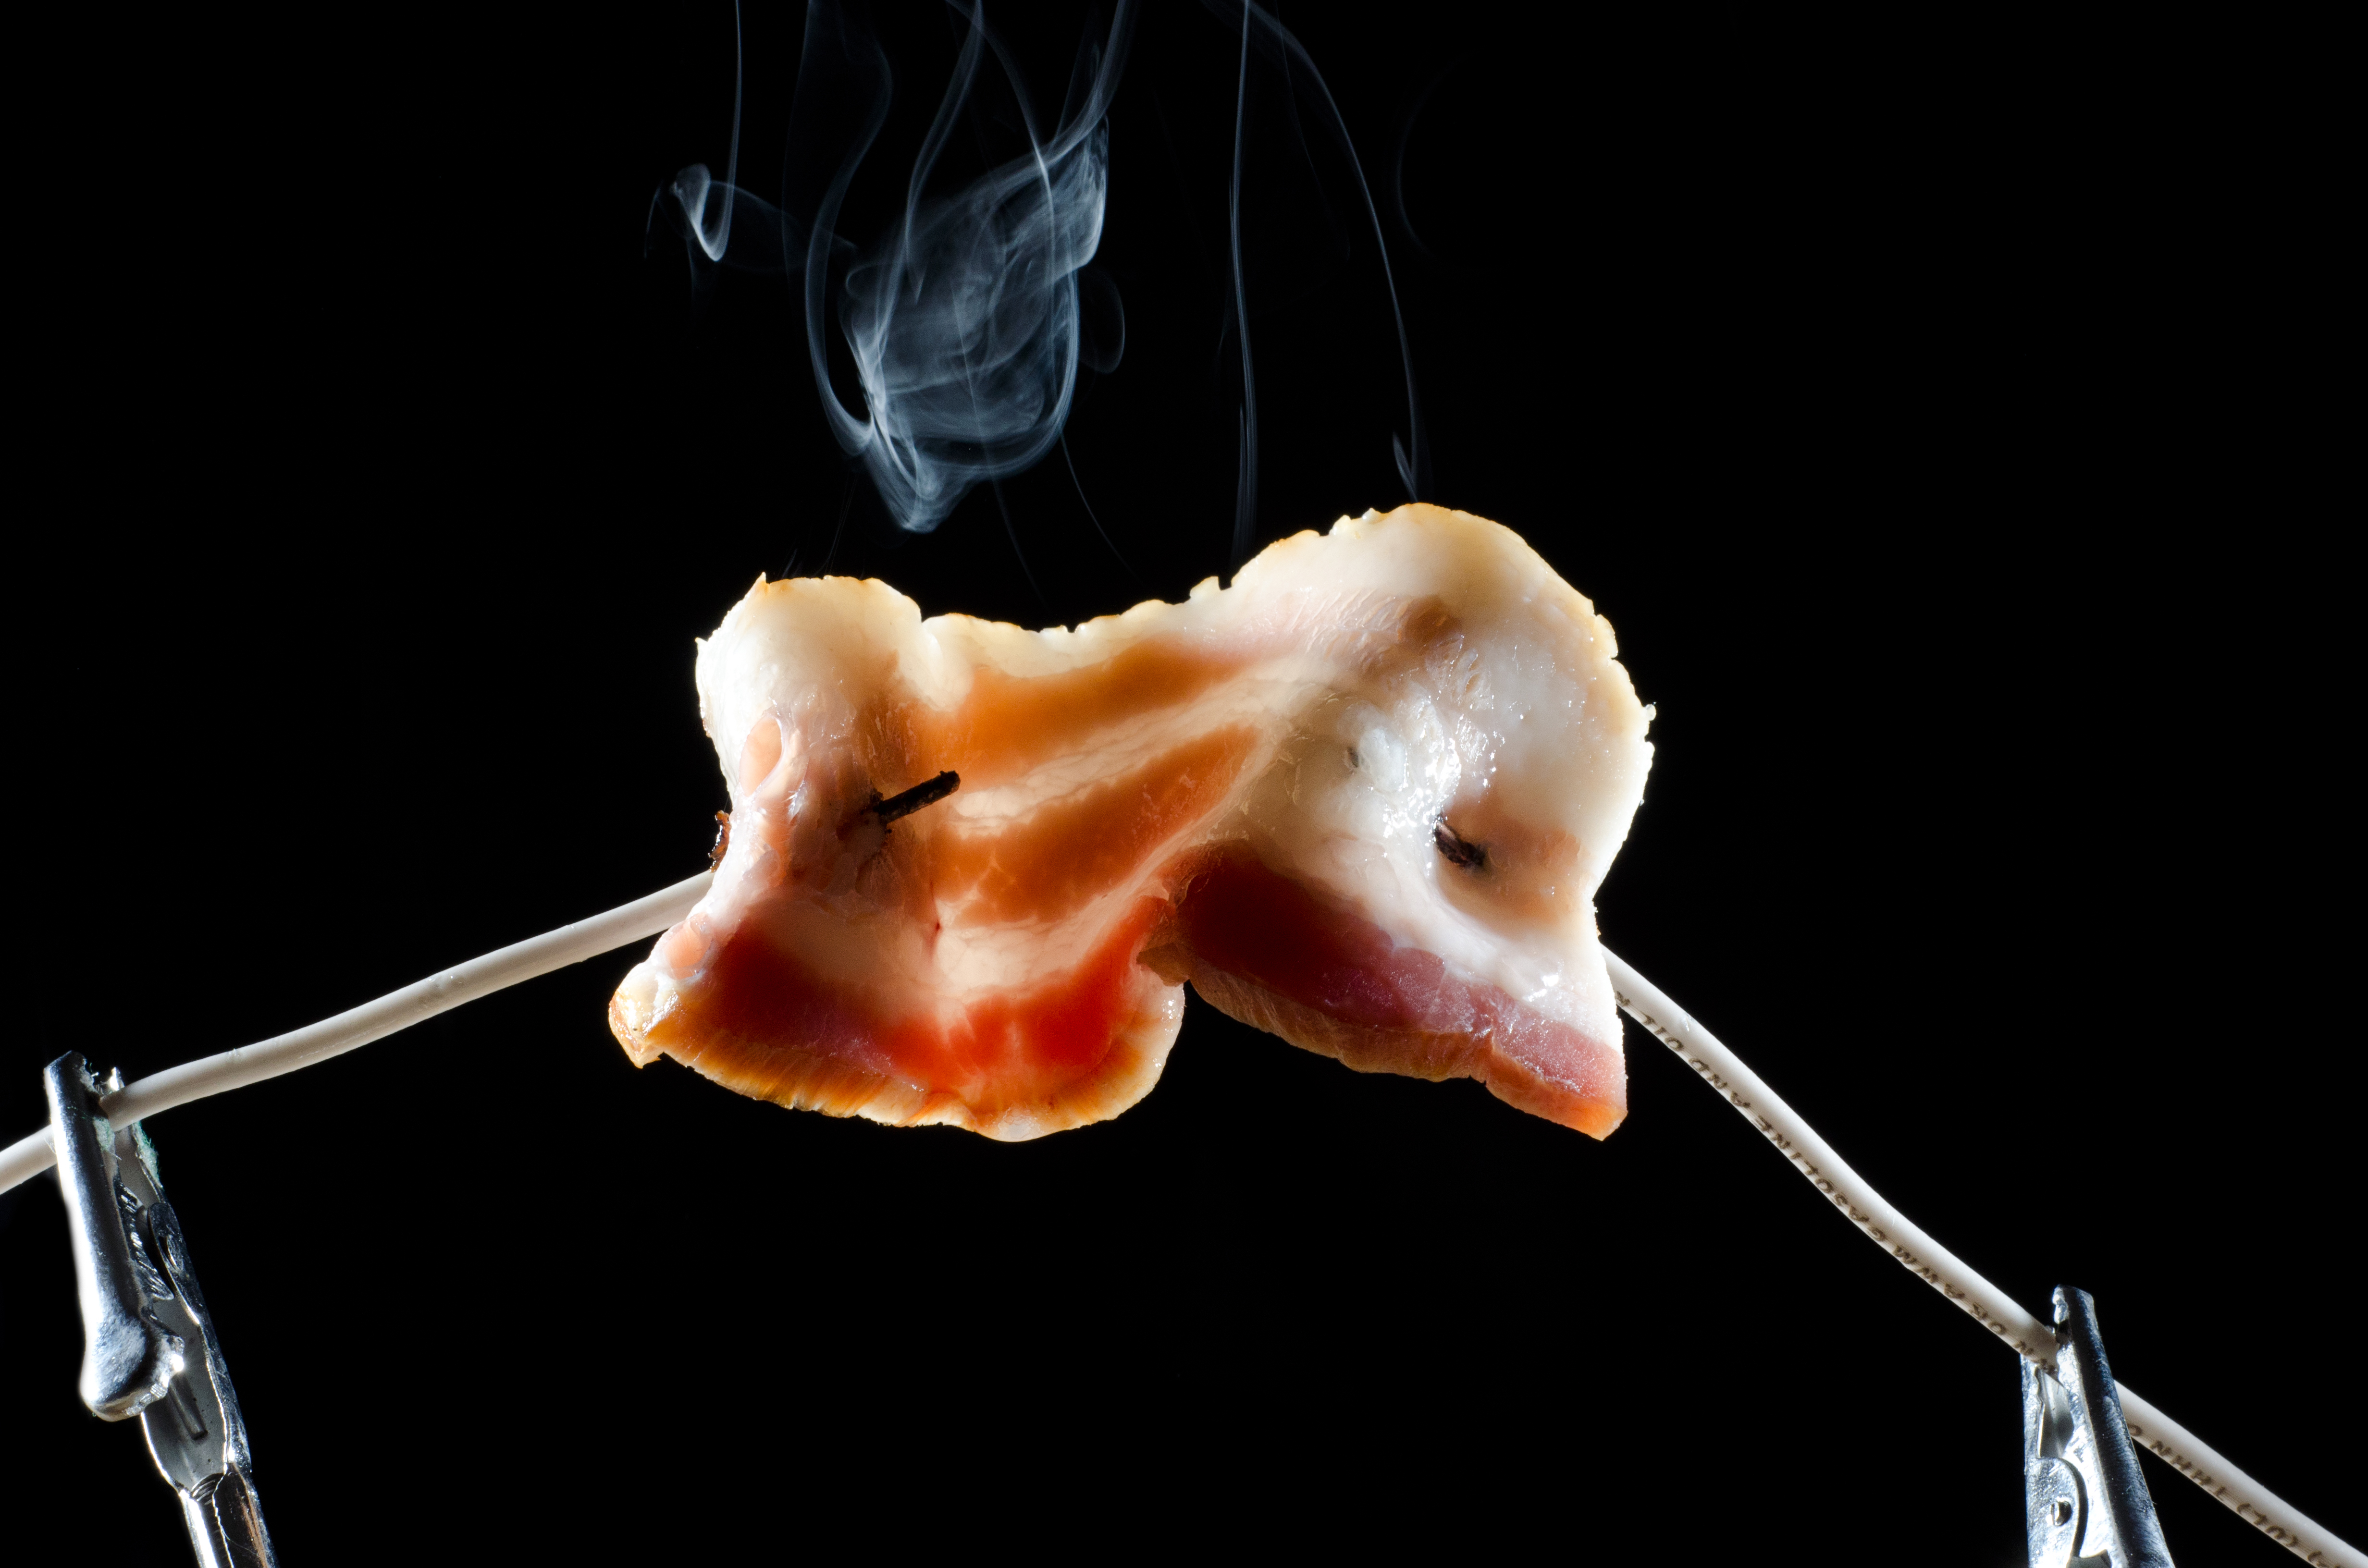
This shot was inspired by a picture of strips of bacon lined up side by side in the Modernist Cuisine section on meat curing. Here, the semitransparency of prosciutto creates a dramatic, almost X-Ray-like effect. The shot above is mine. Below is the inspiration photo from the book, followed by Ryan’s shot, pre- and post-processing. By cropping his shot in tight, Ryan eliminates the messy (and somewhat blurry) edges of the meat.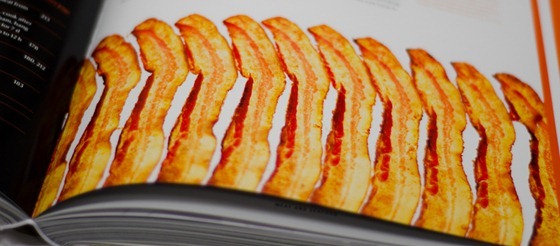

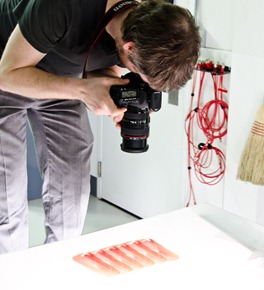
For this shot, Ryan used a piece of semitransparent white plastic, suspended across two sawhorses. He only used one flash, which was bounced off the floor and up through the bottom of the plastic. As you can see in the photo on the right, this effectively creates a gigantic lightbox, which is perfect for highlighting all of the detailed musculature in a thin slice of meat.
As a side note, be sure to clean your food surfaces with a streak-free cleanser before shooting. In this case, the cleaning step allowed us to eat the prosciutto afterwards 🙂
3. Grapefruit Slices
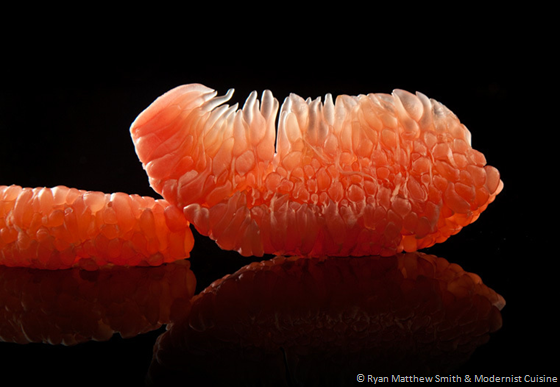
This is one of my favorite shots in the entire book. These slices of grapefruit have been treated with a special enzyme that dissolves the tough connective membrane that holds each bundle of juicy sacs together. The image is full of texture – you can almost feel the bumpy edges of the fruit on your tongue. This shot is archetypal of the artistic style that appears throughout the book: dramatically-lit subjects which evoke a visceral reaction, all the while providing an almost anatomical view of the food. Amazing.
Ryan set up the replica shot quite simply: one strobe (with honeycomb grid) behind the subject at a 30-40 degree angle. The grapefruit slice sat on a sheet of glass coated on the reverse side with black spray paint, but a sheet of shiny black plastic would work just as well. Behind the table (but not touching) was a panel covered with a sheet of black velvet. Although velvet isn’t cheap, it is quite good at disappearing into the background since it reflects light so poorly.
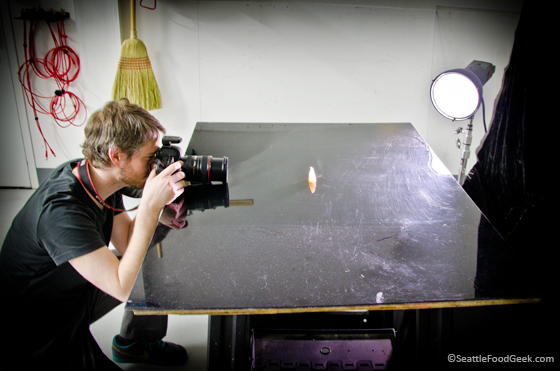
One of the things that struck me about the grapefruit shot in the book was that it appears larger-than-life. Ryan offered a tips for achieving this effect:
- Fill the frame. To make your food look as big as possible, don’t leave a lot of negative space in the frame. It seems like an obvious tip, but I’ve been terribly guilty of this in the past.
- Shoot from “just below eye level”. If you look at the grapefruit shot closely, you’ll see that the camera is pointing just slightly up at the fruit. This creates an effect (to me, at least) of the food being massive – just like how camera angles are used in film: shoot from above to make someone look small and weak, shoot from below to make them look heroic and powerful.
- Print it big. The Modernist Cuisine book has humongous pages printed at extremely high resolution. This doesn’t hurt. If you’re putting photos up on your website, make ‘em large.
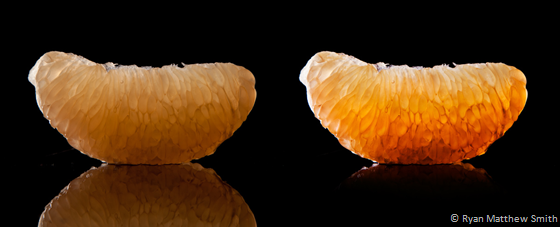
Below is my grapefruit shot, again from my Nikon d7000 with a 50mm prime lens. It took me a few hours to Photoshop this to a point that it even resembled Ryan’s version (on the right, next picture down). Since we used a different species of grapefruit than the inspiration shot, the natural color was more yellow than pink. Also, since this grapefruit wasn’t treated with any enzymes, it still has it’s connective tissue and doesn’t look quite as amazingly bubbly.

These (below) are Ryan’s pre- and post-processed versions of the same shot. As you can see, Ryan is an evil genius in Photoshop. I’m still quite proud of my attempt (above), but clearly I’ve got a lot left to learn! I’ll post a walkthrough of my Photoshop steps in Part 2.
4. You’ve Waited For It… Slow Motion Gelatin!
The footage above is from Modernist’ Cuisine’s ridiculously expensive Phantom high-speed camera. This looked like too much fun to leave alone, so I brought a pack of vegetarian black cherry Jello-esque treats with me to the lab. Using a manual shutter release and an uncanny sense of timing, Ryan proceeded to smash the tasty cubes in front of his lens and capture the jiggly morsels just as they were landing. No sound-activated triggers, no elaborate timing system, no high-speed video camera to capture the action. Just a dude smashing Jello and hitting the shutter button. Amazing!

I absolutely love the way these gels were lit, and, as with all the other shots, the beauty is in the simplicity. As you can see in the setup shot below, Ryan is using two strobes pointed at 45-degree angles at a white background. The gels are entirely backlit from this one reflective source and the effect is astonishing. Also, this is messy business: wear an apron, or suffer the consequences.
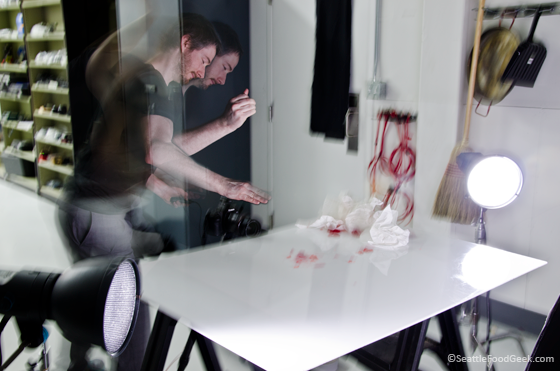
Next time, I’ll walk through some of the Photoshop tricks that turn these images from great to otherworldly. Thanks very much to Ryan for letting us in on some of the secrets to Modernist Cuisine’s amazing photography, and for letting me play for an afternoon!
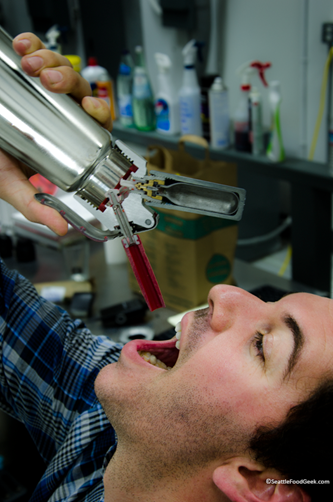
Yep, that’s me and half a whipping siphon. Don’t tell Nathan.
Unbelievable post, Scott – what a great opportunity you had, and I’m so grateful you shared it with all of us!
What a great opportunity – lucky you! Thanks much for sharing. It’s great to see the relative simplicity of these shots.
Nice job, Scott! I’ve done some white plexi but haven’t ventured into clear and black yet, clearly need to add those to my repertoire. By the way, a great alternative to the Broncolor strobes are the ones from Alien Bees. They have virtually the same capabilities but at a little easier to swallow price point. (http://www.alienbees.com/) – and they sell all the light mods like grids and softboxes as well.
I am amazed and grateful, and I can’t wait for Part Two.
Wow! Thanks so much for posting.
Cool post, thanks!
A bit surprised on the technical side: why use a 24-105 zoom lens when a prime lens would capture more detail (e.g. the 100mm f2.8L IS Macro or the 135mm f/2.0L)? Also, isn’t f/22 a bit high when depth of field is not a big issue?
amazing. keep up the good work, and yea.. that photoshop stuff is nuts.
Marc-Andre
The f/22 was not necessary but doesn’t hurt us in this case. It will limit resolution but we are only publishing online, so the logic was the drop in resolution is not hurting us but having a soft edge would. (Almost nothing from the book was shot w such a small aperture)
Same deal with the prime glass, not much use at 600px wide but having the versatility of using a zoom speeds up the shooting process
cheers,
ryan
Wow. Just…. wow. I received my Modernist volumes a few days ago. I’ve only had a small chance to look at a few pages. Looks great. Since I think I might have ADHD, I also received Under Pressure, and Alinea. And 6 others. And just ordered glassware from Spain, a Sous Vide Professional, a ridiculous vacuum sealer, and something else adding to 4 boxes and 45 pounds worth of stuff that should arrive May 2nd. I think I’ll really love this site! And I’m such a novice but this food thing has gotten me rather excited. Oh, and I have some fairly highend photography equipment to catch some of the failures and successes. Thanks for this great site!
dd
That Jello video is the most beautiful thing I’ve ever seen. I tried in my own sloppy way to mimic Modernist Cuisine style with my point-and-shoot 5 megapixel camera and a boring gray plate… but you know, it looks like what it is:
http://www.hippressurecooking.com/2011/04/hip-modernist-soft-medium-and-hard.html
Thanks for the behind-the-scenes peek at creating these beautiful masterpieces!
Ciao,
L
I love the shots. Awesome work, and the site as a whole, but I don’t have to tell you that… You mentioned treating the grapefruit with an enzyme. I was wondering what that was. Your work is inspiring.
James
Awesome; loved this article the first time and just clicked back over to see what the lighting setup was for the grapefruit b/c I just bought some black plexi and I have a date w/some seared watermelon tonight :).
You can definitely see your expertise in the work you write. The world hopes for even more passionate writers such as you who are not afraid to mention how they believe. At all times follow your heart.
“I am not a glutton… I am an explorer of food!”- Erma Bombeck
I’m really enjoying the design and layout of your blog. It’s a very easy on the
eyes which makes it much more enjoyable for me to come here and visit more often.
Did you hire out a designer to create your theme?
Outstanding work!
Hi, I do think this is a great site. I stumbledupon it 😉 I may return
once again since I book-marked it. Money and freedom
is the greatest way to change, may you be rich and continue
to guide others.
Howdy, i read your blog from time to time and i own a similar one and i was just curious if you get
a lot of spam comments? If so how do you stop it, any plugin or
anything you can suggest? I get so much lately it’s driving me mad so any assistance is very much appreciated.