I had the incredible opportunity to help the GIR team develop the coffee freshness sensing technology that will become part of the Voltaire, launching on Kickstarter today. I’m very proud of how much we accomplished in a very short period of time, but I’m even more impressed with how the technology to enable such rapid development is so accessible. If you’ve ever wanted to make your own IoT device – either commercially, or as a personal project – you might find this interesting.
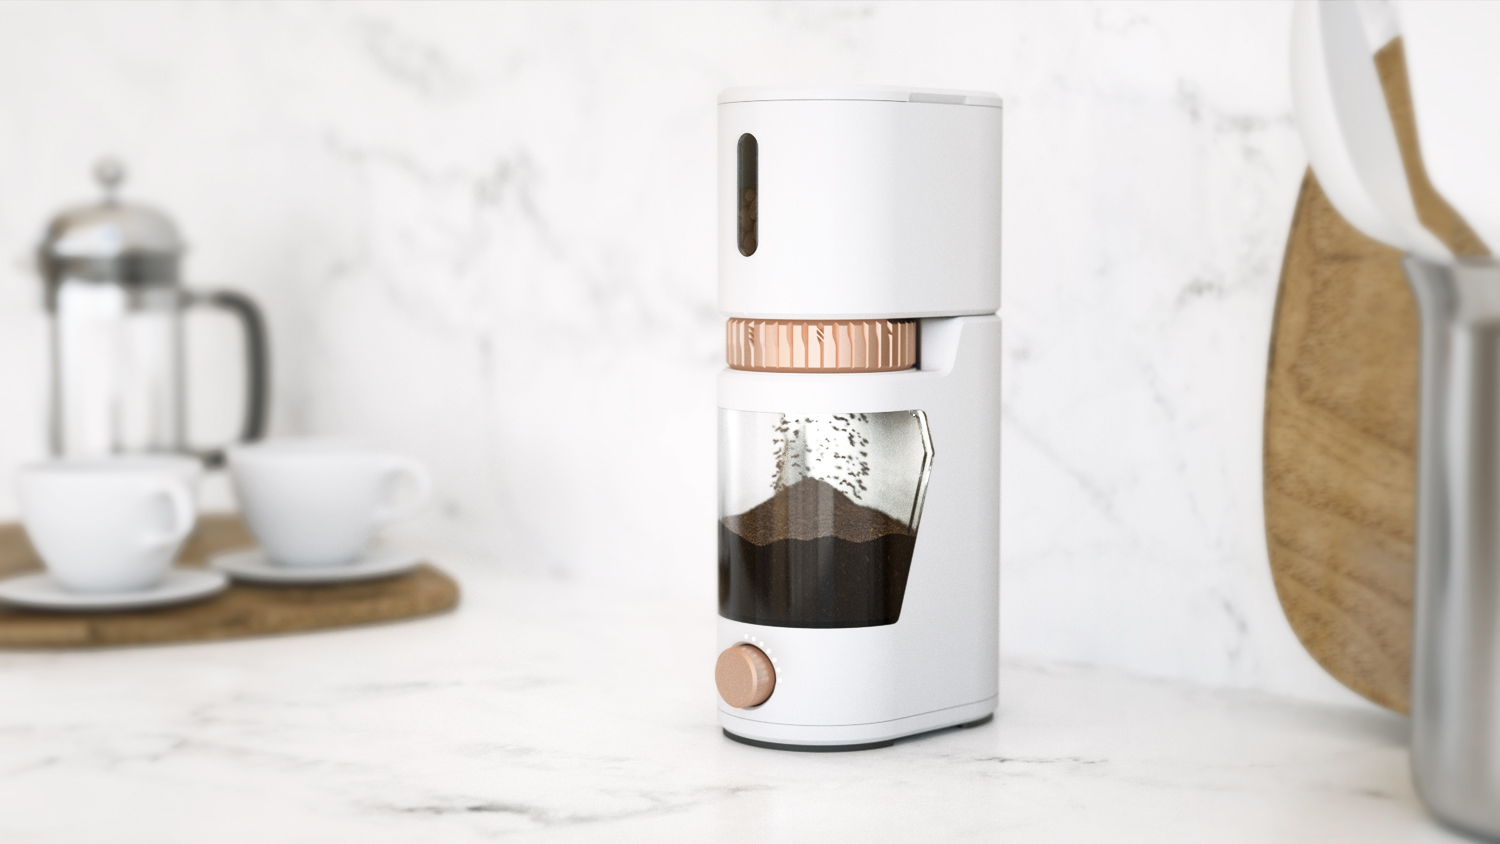
But first, a shameless and resounding endorsement for the Voltaire. I’m a major coffee geek, and my morning espresso is more of a ritual than a routine. Anyone who has ever pulled a life-changing shot of thick coffee knows that you can’t make great espresso without an excellent grinder. So when GIR – the only folks in the world who have made me fall in love with a spatula – said that they were going to build a coffee grinder, I got very excited. But, this grinder is different from any you’ve used before. It’s smarter. If you want to learn more about the product, head on over to their Kickstarter page. If you want to learn about how we developed the sensing technology, read on.
Starting From The Bottom
Here’s how it happened. At this year’s International Home and Housewares Show, Samantha Rose, GIR’s founder CEO, showed me a prototype of a grinder that her company was working on – a Mr. Fusion-esque, sleek, portable coffee grinder with high-quality burrs and some very useful features like a digital timer. “But,” she said, “we had this idea to make it sense the freshness of your coffee beans, too. Except we’ve never done that kind of thing before.” My eyes lit up. I had done some of that kind of thing before for Modernist Cuisine projects, and as it turned out, I was about to have a lot of time on my hands. We decided to give it a shot (pun intended).
Sniffing Headspace Gasses with Little Electronic Noses
By the end of week 1, we had determined that the idea was feasible. We pored through existing academic and industry research on coffee staling, and I ordered a bunch of gas sensors: CO2, Methane, Aldehydes, Ethanol, and others, and wired them up to a data logger. When I put the sensors in a container with coffee beans, their readings spiked. And, when we left the setup to log data over time, we could see that the concentration of the headspace gasses in the container diminished over time, just as we’d expect from beans losing freshness. This was great news, but far too little data to have certainty that we could determine freshness.
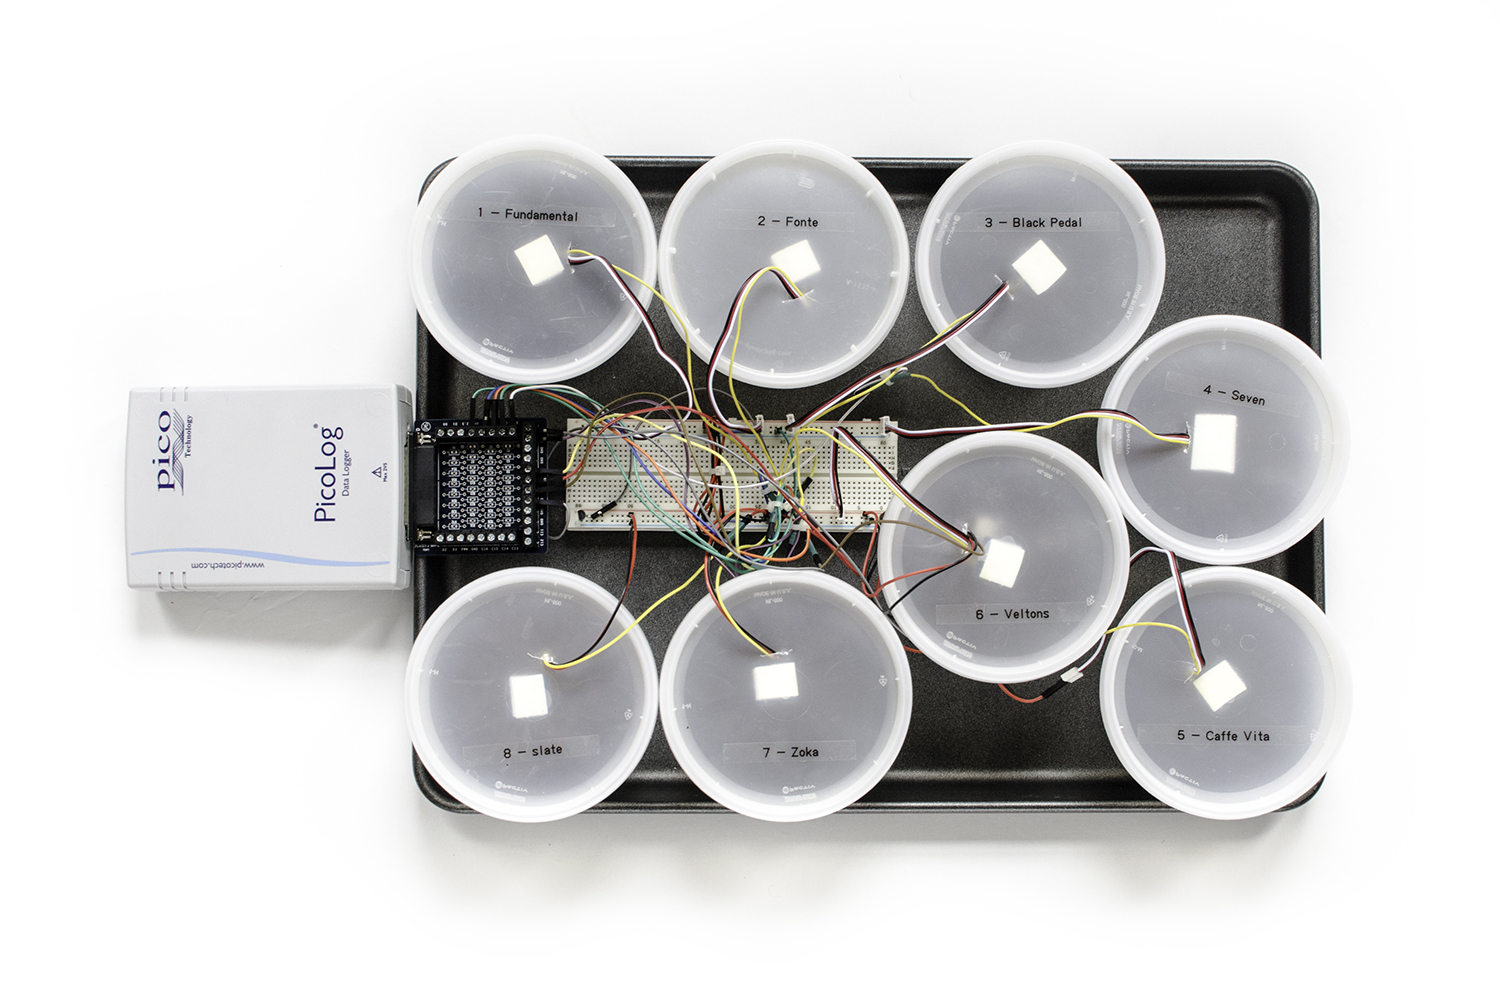
Over the next three weeks, we devised and ran a set of experiments to rule out as many confounding variables as we could. We measured and manipulated temperature, humidity, bean quantity, roast type, roast age, and grinding action, and we simulated a handful of storage scenarios before we finally convinced ourselves that the data we read from the sensors could be used as a reliable measure of freshness.
Having inexpensive and accurate data loggers let us parallelize much of this testing – one of our tests ran continuously for 30 days! Had we been limited by our ability to record from multiple sensors at once, the timeline would have grown considerably.
Patent Pending
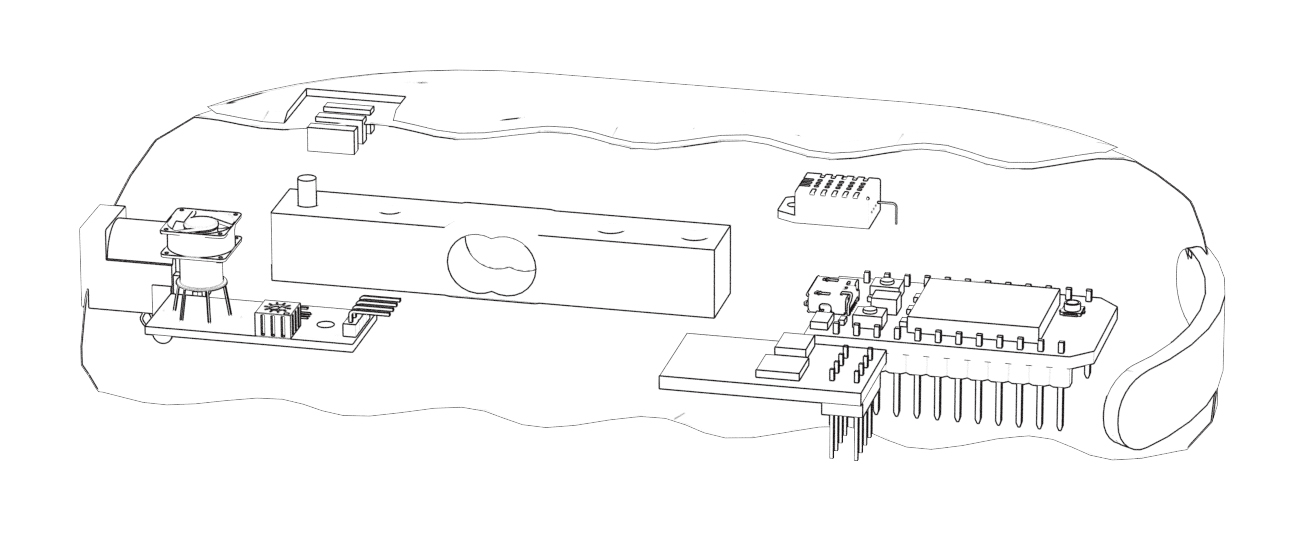
Once we were confident that this approach was sound, we wrote and submitted a patent application. Since the GIR team had done their industrial design in a CAD environment, it was trivial to create patent figure drawings from the 3D model, including cutaways. I whipped up a crude-but-useable 3D model of how we envisioned the sensing technology integrating with the grinder and rendered that out for patent figures as well. In the old days, we would have had to pay a technical artist to compose those drawings, costing the project both time and money. Now, all you need is Netfabb (free!) or a similar program to open nearly any 3D model format, inspect your parts, slice cutaways, and export your drawings. That closed out week 5. We were on a roll.
Prototyping in the Blynk of an Eye
Now that we had a handle on working with the sensors, and an idea of how to package up the sensing technology, it was time to make a prototype. We decided on a “sensing base” form factor: a platform on which the grinder would sit that contained the electronics necessary for taking the measurements we’d need. Moving from bench experiments running on data loggers to a standalone prototype would allow us to interact with the sensing technology more naturally, emulating a user’s experience at home. We believed this might reveal key insights about how the freshness sensing experience should be designed – from hardware to service to mobile app – and could inform decisions early on, while changes are cheap and easy to make.
We had a few requirements for the prototype:
- It needed to connect to the internet to log data that we could use later for analysis,
- It needed to provide some way for a user to interact with it from his or her mobile device, and
- It needed to be cheap enough to clone, so prototypes could be deployed for wider testing.
I had worked with Arduino in the past, and it was the natural platform choice for a small, internet-connected device that needed to read from sensors and control hardware. But, as we also needed to support a client interface, I dreaded the thought of having to run a web server on Arduino, or worse yet, build a cloud service and native mobile app from scratch.
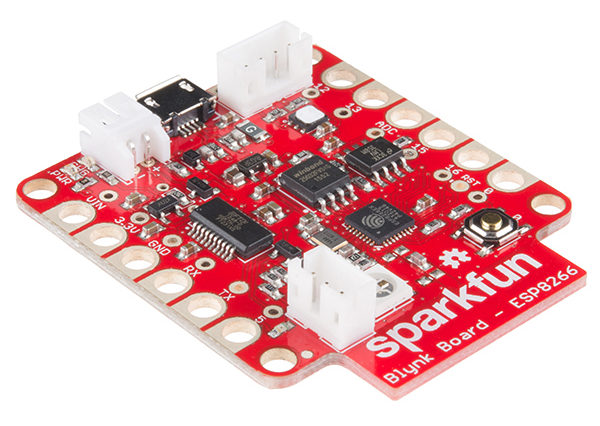
You can imagine, then, how happy I was to discover Blynk. Blynk is a customized flavor of Arduino that comes nicely packaged in the SparkFun Blynk Board. For $29.95, it provides WiFi, an onboard temperature and humidity sensor, an RGB LED – very useful for communicating status – an analog-to-digital converter for reading from analog sensors, and enough digital input/output pins to suit our needs. But that’s not even the great part…
Blynk is also the cloud service and mobile app I had been looking for! You see, on an Arduino running Blynk’s library, the communication between pins on the board and your mobile app is pre-wired. In fact, if you’re doing simple enough things – like turning on or off a pin, reading an analog value, or changing the color of the LED – you don’t even have to write any code. Zero. Not a line. Press a button on your mobile app and watch the Blynk board respond. It was like magic.
Of course, our scenario was a little more complex than that. We had to interpret gas sensor values, read from a load cell, output status, and set some parameters that influenced the device’s behavior. In all, I wrote fewer than 700 lines of code (including comments!) to power the entirety of the freshness sensing prototype. Blynk’s code and a few Arduino libraries did the heavy lifting.
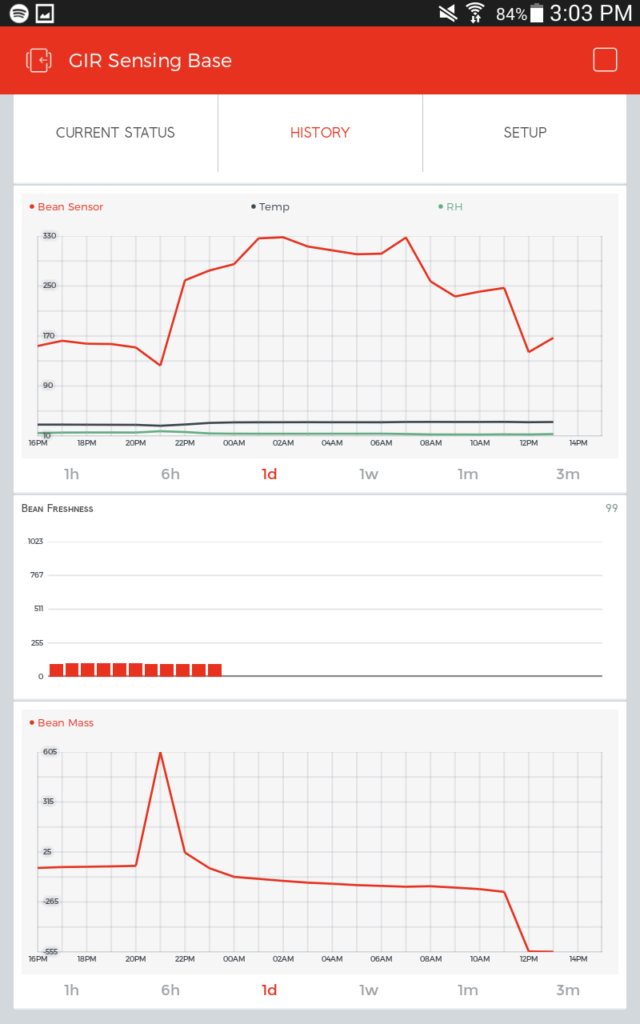
I also didn’t have to write a single line of UI code to deliver a fully-functional mobile app. The Blynk App (Google Play, Apple App Store) lets you drag-and-drop simple UI controls, like buttons, sliders, gauges, labels and even graphs and a terminal window. Within the mobile app itself, you can connect those UI controls to the Blynk board by assigning them pins: analog or digital pins to correspond to the Blynk hardware, or virtual pins that can be read and written by customizing the software running on your board.
Logging Data
The one place where the Blynk offering falls short is in its data logging and retrieval. Blynk does log the data that your board collects. Just add a graph control to the UI and connect it to the pins you want to monitor. However, getting that data back out of Blynk for analysis is still underdeveloped. Yes, there are ways to access it through a REST API, but that’s a pain.
So, we decided that in addition to letting Blynk do its logging, we’d also log somewhere more accessible for analysis. The obvious choice was ThingSpeak. It’s a free service designed for IoT devices to stash timestamped data, and they have Arduino libraries readymade. We were restricted to logging every 15 seconds at most, but that’s still plenty of resolution for our needs. When it’s time to analyze, it’s a one-button click to open your log in Excel. Not bad for $0.00.
Designing the Enclosure
In addition to having user-friendly software, we also wanted the sensing base prototype to have a physical form factor that matched the grinder, and could be evaluated for industrial design and manufacturing. I had previously worked in 3ds Max – a great environment for mesh editing, but problematic for making physical stuff. In the past, I’d run into issues with my 3ds Max models not being watertight or having wall thickness problems when it came time to 3D print. So, I turned to Autodesk Inventor, which is a much more appropriate tool for designing stuff… especially stuff that needs to be assembled.
Thanks to some helpful training videos, I was able to get up-to-speed in Inventor in a day or two. Most of the electromechanical components we used had free 3D models available from SparkFun directly, and I found a load of others on GrabCad. This meant that I could spend less time measuring mount hole spacing with my caliper, and more time projecting the 3D models onto my Inventor drawings so I could see how everything would fit and where screw holes and standoffs should go. I could even drop in standard sized machine screws, making it simple to determine which screws I’d need to buy for assembly. From there, the design process was extremely fast: I was ready to print the enclosure components within a few days of CAD tinkering.
I’m Still Amazed by 3D Printing
I should find 3D printing to be blasé by now since I’ve printed in thermoplastics, rubber, resin, porcelain, and stainless steel, but I’m still blown away every time I hold a 3D object that I dreamt up on my computer. Our big challenge was printing quickly enough to allow for iterations and reprints, if necessary. Although GIR has their own 3D printer, it was in Chicago and I’m in Seattle. That meant adding days of transit to turnarounds, and high shipping costs to rush delivery.
Instead, we turned to 3DHubs.com. It’s a service that connects you to people in your area who have 3D printers and will print your parts for a fee. I was lucky enough to find someone a mile away from me who printed my design with a 2-day turnaround for less than $70. That is pretty damn unbeatable.
I was thrilled to discover that assembly worked on the first print! [Brushes off shoulder]. All of the internal components fit exactly as they should, screws fit into screw holes, and things that should align did. That’s all thanks to having great software and a community-built library of 3D models at my fingertips.
Can you imagine how much this housing would have cost – in specialized software, industrial designers, CNC machining, and finishing – only a few years ago? Without cheap and ubiquitous 3D printing, and the easy-to-use software adoption it has driven, this would have been a months-long, megabucks endeavor.
Putting it all together
So, after two weeks of prototyping work, and only 8 weeks since we kicked off the freshness sensing project, we had an actual, physical, internet-connected prototype running our own code, measuring actual coffee headspace gasses, controllable with an Android and iOS mobile app, and logging unlimited data to a cloud service for analysis.
Consider for a minute the incredible confluence of technologies that makes that possible. It’s never been easier to prototype these types of devices, and I’m sure that it won’t be long until the technology references in this article seem laughably outdated. Drake said it best: “What a time to be alive.”
In the spirit of the maker and hacker communities who drove these technologies forward, GIR has decided to make the sensing base’s firmware open source, and will provide APIs and SDKs to allow enthusiasts to develop their own apps that can work with the sensing base’s technology. Even though it was designed to measure the freshness of coffee beans, I can’t wait to see how others repurpose it!
This was a wildly cool project, and it was an honor to be involved. I’m so thrilled to see the Voltaire hit Kickstarter, and I encourage you all to support it if, like me, you care about great coffee.
Hi Scott,
This looks fantastic! Can I ask whether you did the patent filing yourself, or with a firm? I’m looking to learn a bit more about how people in the food tech space view and think about patents (full disclosure: I’m a local attorney).
Thanks!
Bryan
Hi Bryan,
We wrote a very detailed disclosure and made the figure drawings ourselves, but then handed it over to a Seattle-based IP firm to draft the actual patent document and take care of the filing. I’ve worked with this particular patent attorney for years and love the way he works. I’d have very low confidence that anything we wrote and filed without a professional patent attorney would ever get granted, given how specialized the language must be to make claims protectable. Even though our disclosure was detailed and structured well, the final patent application was almost entirely re-written in patenteese.
Scott,
Thanks so much for the further info! Patnenteese certainly is a language to itself. I’m a food-science hobbyist with a professional background in patents, and it’s always fun to see the worlds collide. The value placed on legal protection varies so much among industries, and it’s great to see some (non-confidential) details about how you approached the process.
Would you be willing to share the name of your attorney (perhaps via email)? It would be great to know where the expertise here in Seattle.
Thanks,
Bryan
Hi, this is Pavel from Blynk.
You can actually get the data in CSV in case you install local Blynk server. Then everything is saved locally.
It’s really easy to do, BTW, just a couple of lines in Terminal.
You can ask on our forum http://community.blynk.cc or check the docs: http://docs.blynk.cc/#blynk-server
Also, we’d be happy to discuss exporting your project into a standalone app and applying branding if needed. Please email to iot@blynk.cc
Thanks so much for chiming in! You guys have created an excellent product and service, and clearly, it was invaluable for my prototyping work.
I had seen in documentations and on your forums that I could do a CSV export if I ran a local Blynk server, but running a server locally isn’t a good solution for my or GIR’s needs in this case. Since neither of us are technology companies, we didn’t want to deal with the trouble of allocating hardware and keeping a physical machine running somewhere. Plus, the folks interacting with the prototypes moving forward won’t necessarily be tech-savvy users who would be comfortable in a terminal interface, but who are totally OK with navigating to a website to download a CSV for analysis. The rest of the Blynk service is so fantastic, but as I noticed from other commenters on the forums, there’s a big demand to retrieve CSV data from the Blynk-hosted service.
Thanks so much for chiming in and for your offer to help! I’ll pass this along to the GIR team as they move forward from prototype to production!!
Thanks for such a great feedback. We will implement CSV downloading / linking soon. Great article and great product! Wishing you all the best with the campaign and would be happy to help with the apps.
Hi! Very interested in how you quantified coffee “staling”? I’ve even heard of the coffee oils going “rancid” – not sure if there’s much truth to that. Can you share any of the published literature you referenced for this work?
We referenced a ton of existing literature – too much to enumerate here. But, the gist in the existing research is that human-perceived freshness of coffee, as measured by panels of tasters, is tightly correlated with the concentration of certain volatile organic compounds present in the beans and released into the headspace of the beans’ container as they offgas after roasting. There are hundreds of such compounds in coffee, but we focused on aldehyde-family molecules as they were both highlighted in literature and detectable with existing, available sensors.
If you’re interested in learning more about the existing literature, here’s the best place to start:
https://scholar.google.com/scholar?q=coffee+staling&btnG=&hl=en&as_sdt=0%2C48
Hello Scott I’ve been looking around for both the patent application and the website where I can download and play with the open source sensing software. Could you please tell me where these are located? many thanks / Luke
Love this project, but I think the technology of sensing to coffee’s freshness extends way past what this device has to offer. For example, Coffee Roasters and Brewbar Baristas could use this understanding how long different varietals and roast levels stay fresh. This is important not only for quality control, but also roasting and brewing inventory control and workflow.
Working on a research proposal for advanced flavor profile development, this technology would be helpful in our lab workflow. As we taste test different coffees using different brewing methods, it would be helpful know the freshness level of the coffees. This way we would only test coffees at the same level of freshness against each other,
There as so many application for this technology, I hope more products and apps will result from this project.
amazing project, now i can say world can do a lot more than just designing action figures from 3D printing. great project.
dpr3ptyv
3kwvmd
d8lxo2