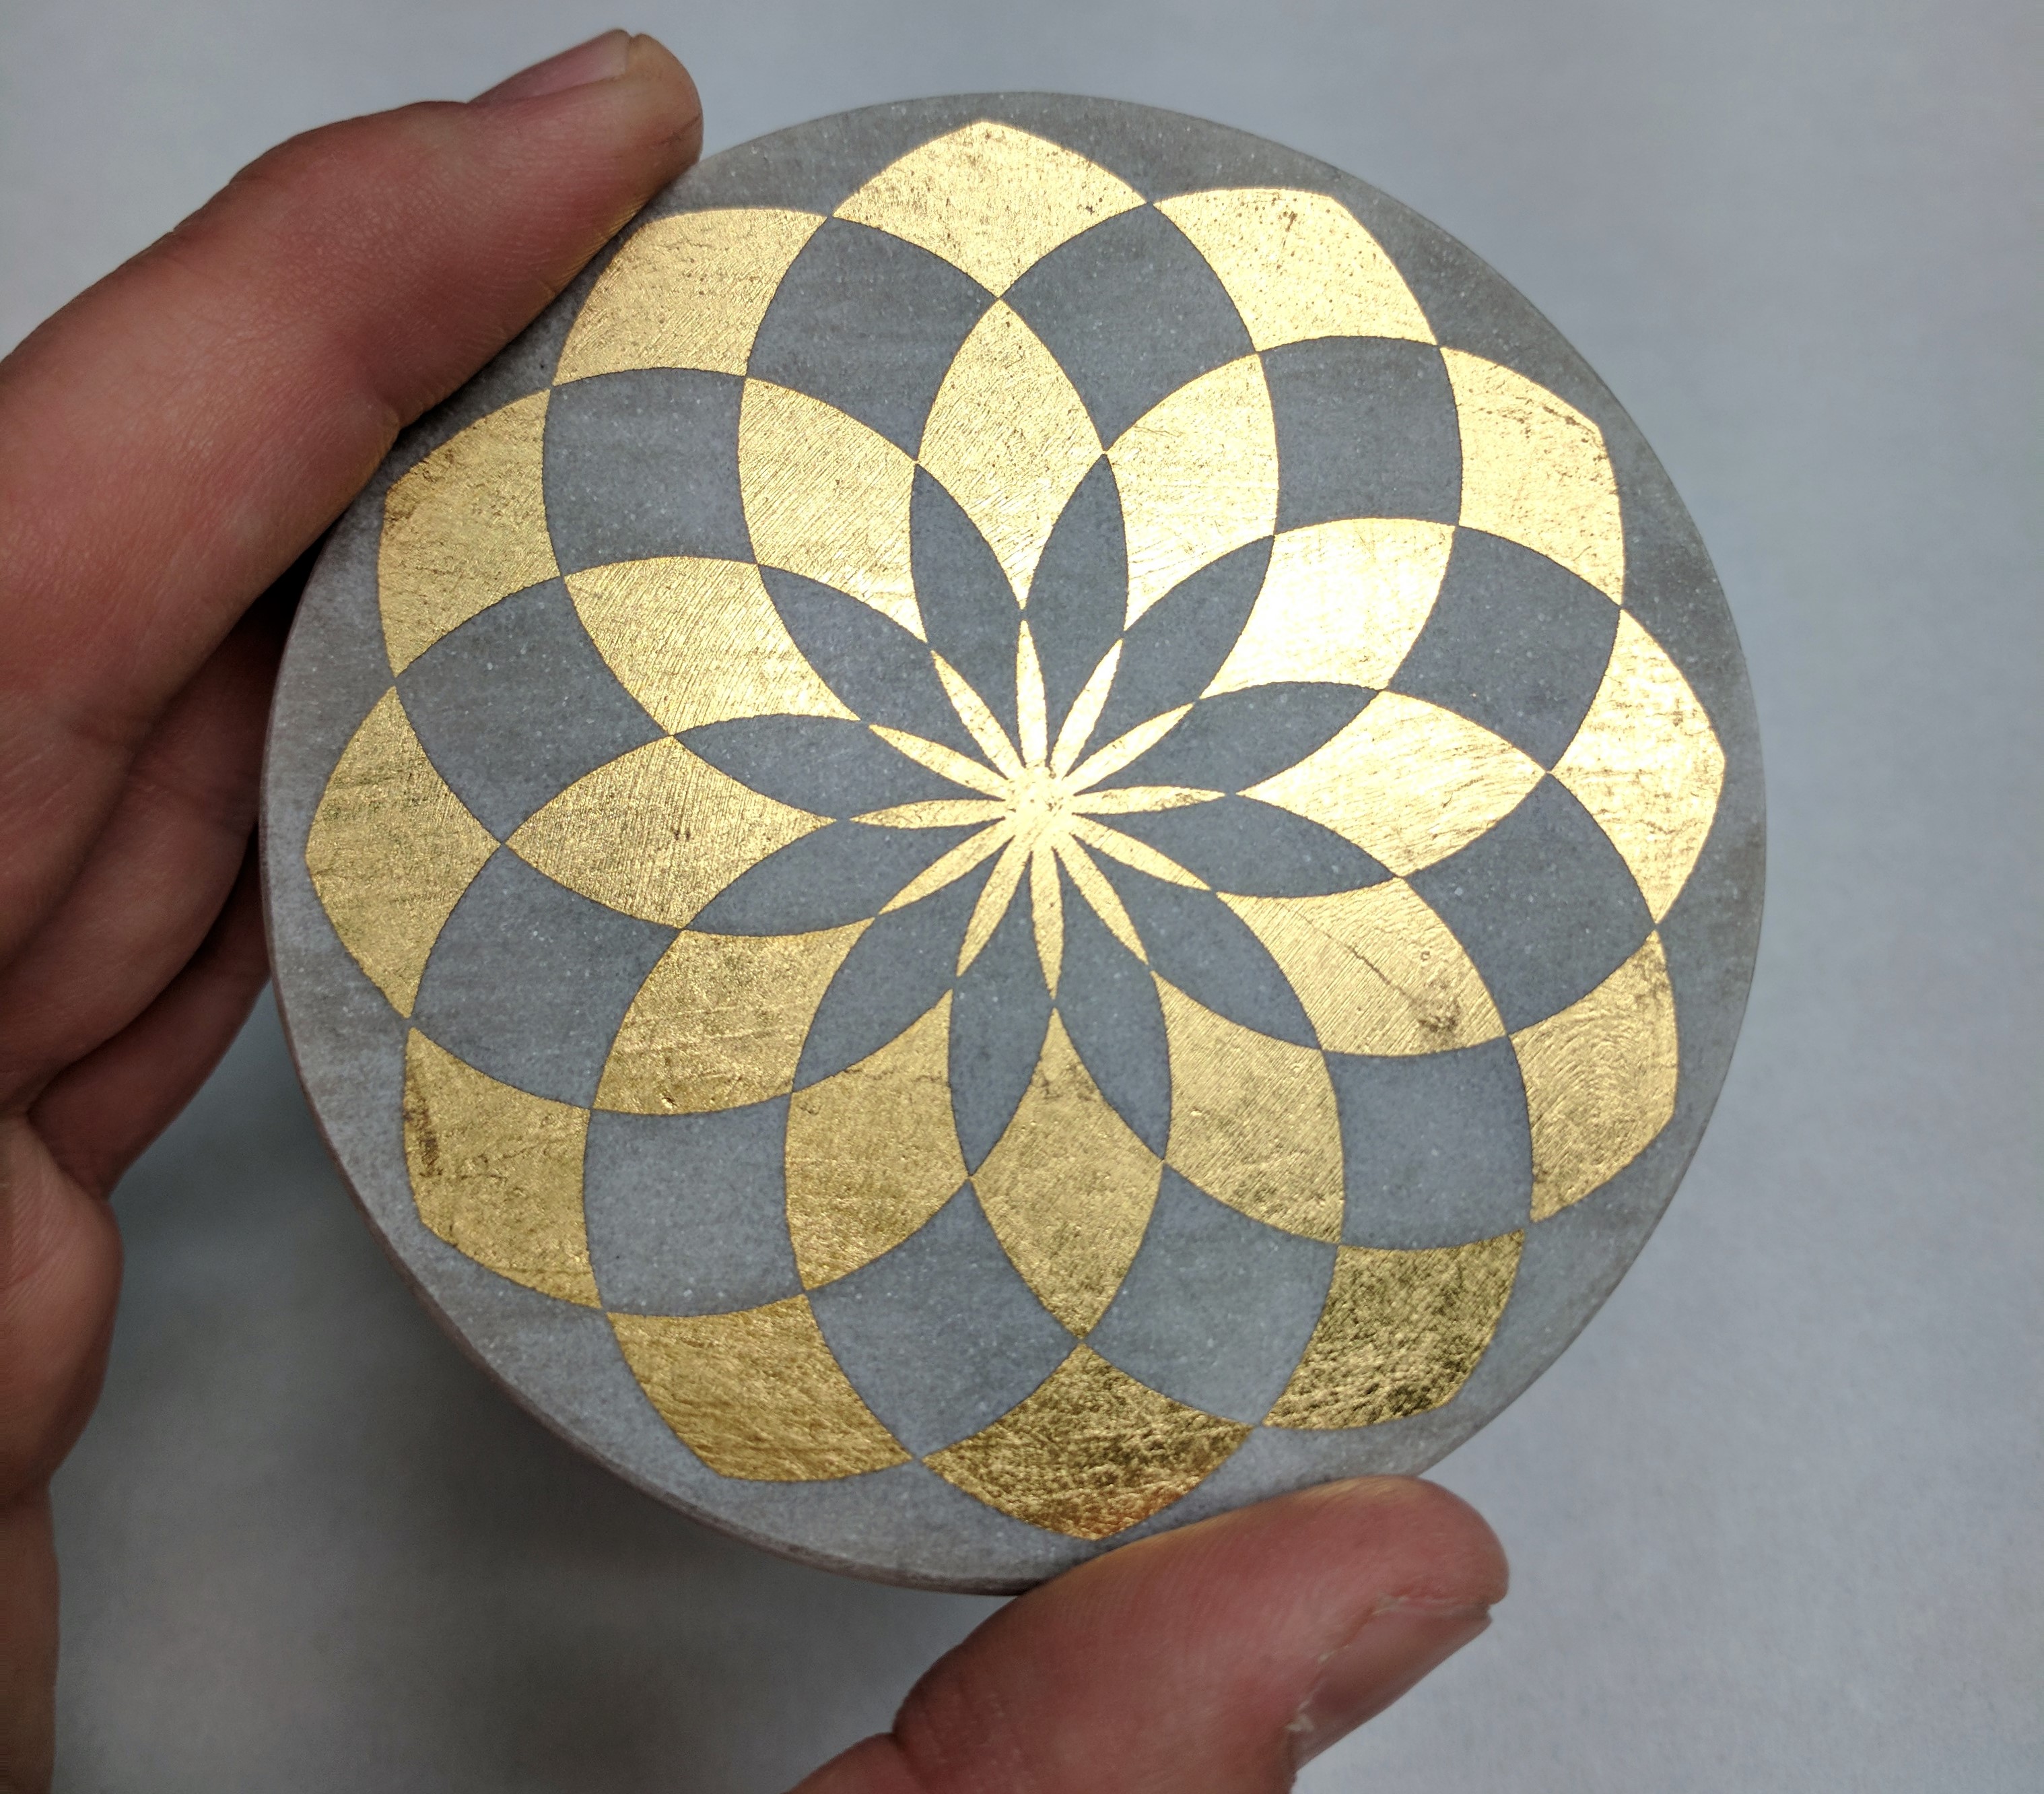
DIY Laser-Cut Gold Leaf Drink Coasters

I’ve got great glassware and I can mix a decent drink. So what’s the next step in advancing my home cocktail program? Custom drink coasters, naturally. I made these laser-etched, marble and gold coasters to match the pattern on my ice stamp, which is either very thoughtful or clinically obsessive, depending on your perspective. Here’s how I made them.

  1. Buy some marble coasters. The same technique will work with other natural stone, and with larger pieces like a cheese board or serving tray.
  2. Most (not all) marble coasters will have a sealant or coating on them. If it looks glossy, it’s probably coated. Sand off the coating with 180 grit sandpaper. This will help the gold leaf adhere. Make sure the coaster surfaces are clean and dry before the next step.
  3. Coat the top surface of the coasters with metal leaf adhesive, following the manufacturer’s instructions. Allow to dry until tacky as instructed.
  4. Coaster and gold leaf
    Working one at a time, lay a sheet of gold leaf flat on your work surface. Place the coaster, adhesive-side-down, onto the gold leaf. Give it a good push and a little shimmy from side to side. Then, use a brush (I like silicone pastry brushes) to push any overhanging parts of the gold leaf into any empty areas of the adhesive. Handle the coasters carefully at this stage, as the gilding can easily scratch.Coaster on top of gold leaf
    Coaster with gold leaf applied
  5. Next, fire up your laser cutter / engraver. This is the cool part. Using minimal power and raster etching (as opposed to vector cutting), the laser will vaporize the gold foil while leaving the marble beneath largely unscathed. This leaves you with incredibly sharp lines. A few tips:
    1. Your artwork will need to be inverted before etching. That is, the black parts of the artwork gets removed, and the white parts of the artwork is where the gold leaf will remain.
    2. If you’re using a “full bleed” design like mine, make sure the black area of your artwork extends beyond the edges of your coasters.
    3. Running these etching jobs in a large batch is way faster than etching them individually. To get the artwork aligned with the coasters, lay down a sheet of butcher paper across your laser cutting bed. In your artwork, create an outer outline in, say, green. Then, arrange the multiple instances of your design – say, 6 columns, 2 rows. In a first pass, disable the black raster layer, and set the green layer to just barely singe the paper you laid down. Now, you have a set of faint circles that correspond to exactly where you should place your coasters. Turn back on the black raster layer and you’re ready to etch.

  6. Finally, seal your coasters using a spray sealer for metal leaf.

I nearly cheaped out and bought faux gold leaf as opposed to the real stuff. I’m so glad I didn’t. These coasters have the unmistakable luster of real gold. The sharp lines in the design represent a level of craftsmanship I could never have achieved by hand or with a stencil. And the fact that they’re DIY and one of a kind makes me that much happier, every time I set down my drink.

IMG_20170727_193754

Learning Latte Art – The Next 50 Cups

Latte art is still hard. Nearly two years ago, I spent an afternoon making 50 lattes, back-to-back, on my home espresso machine. A few weeks ago, I decided it was time for another round of dedicated practice.

This time, I made 50 lattes on the professional-grade La Marzocco machine in the break room kitchen at the Modernist Cuisine lab, instead of my Rancilio Silvia. Mainly this was for speed – dual boiler vs. single boiler – but the capabilities of an espresso machine and grinder 10x the price of my home setup should not be ignored.

Alas, even my best attempt doesn’t compare to what a Seattle barista can pour… blindfolded. Although though this was a session of intentional practice, these are not the best looking lattes I’ve ever made. Swapping out the familiar Espresso Vivace beans and grind setting for a commodity bean was a terrible idea. Swapping out the familiar brand of whole milk for 2% was also a terrible idea. All of the timing, sounds, and instincts that I’ve been developing every morning at work went straight down the drain by changing those parameters. My heart was in the right place: I didn’t want to waste good beans. Oh what a mistake. It took me nearly 30 lattes to recover, and even then, yikes.

I’m happy to report that the average quality of my daily latte art has been on an upward trend for the last two years – even beyond the mediocre level I demonstrate in the video. But clearly I have a lot more practice ahead of me.

No, I didn’t drink these.
Attempting to Learn Latte Art – The First 50 Cups

I’ve always been in awe of latte art. We’re spoiled in Seattle, where our coffee culture attracts an echelon of baristas that I only seem to appreciate when I’m traveling to less caffeinated cities. Chances are, the bearded hipster who pulls your espresso shots at the corner café can pour a perfect rosetta with his eyes closed. I wanted to learn how to do the same. So, I spent the entire day making 50 lattes, back-to-back. As it turns out, latte art is really, really hard.