DIY Laser-Cut Gold Leaf Drink Coasters

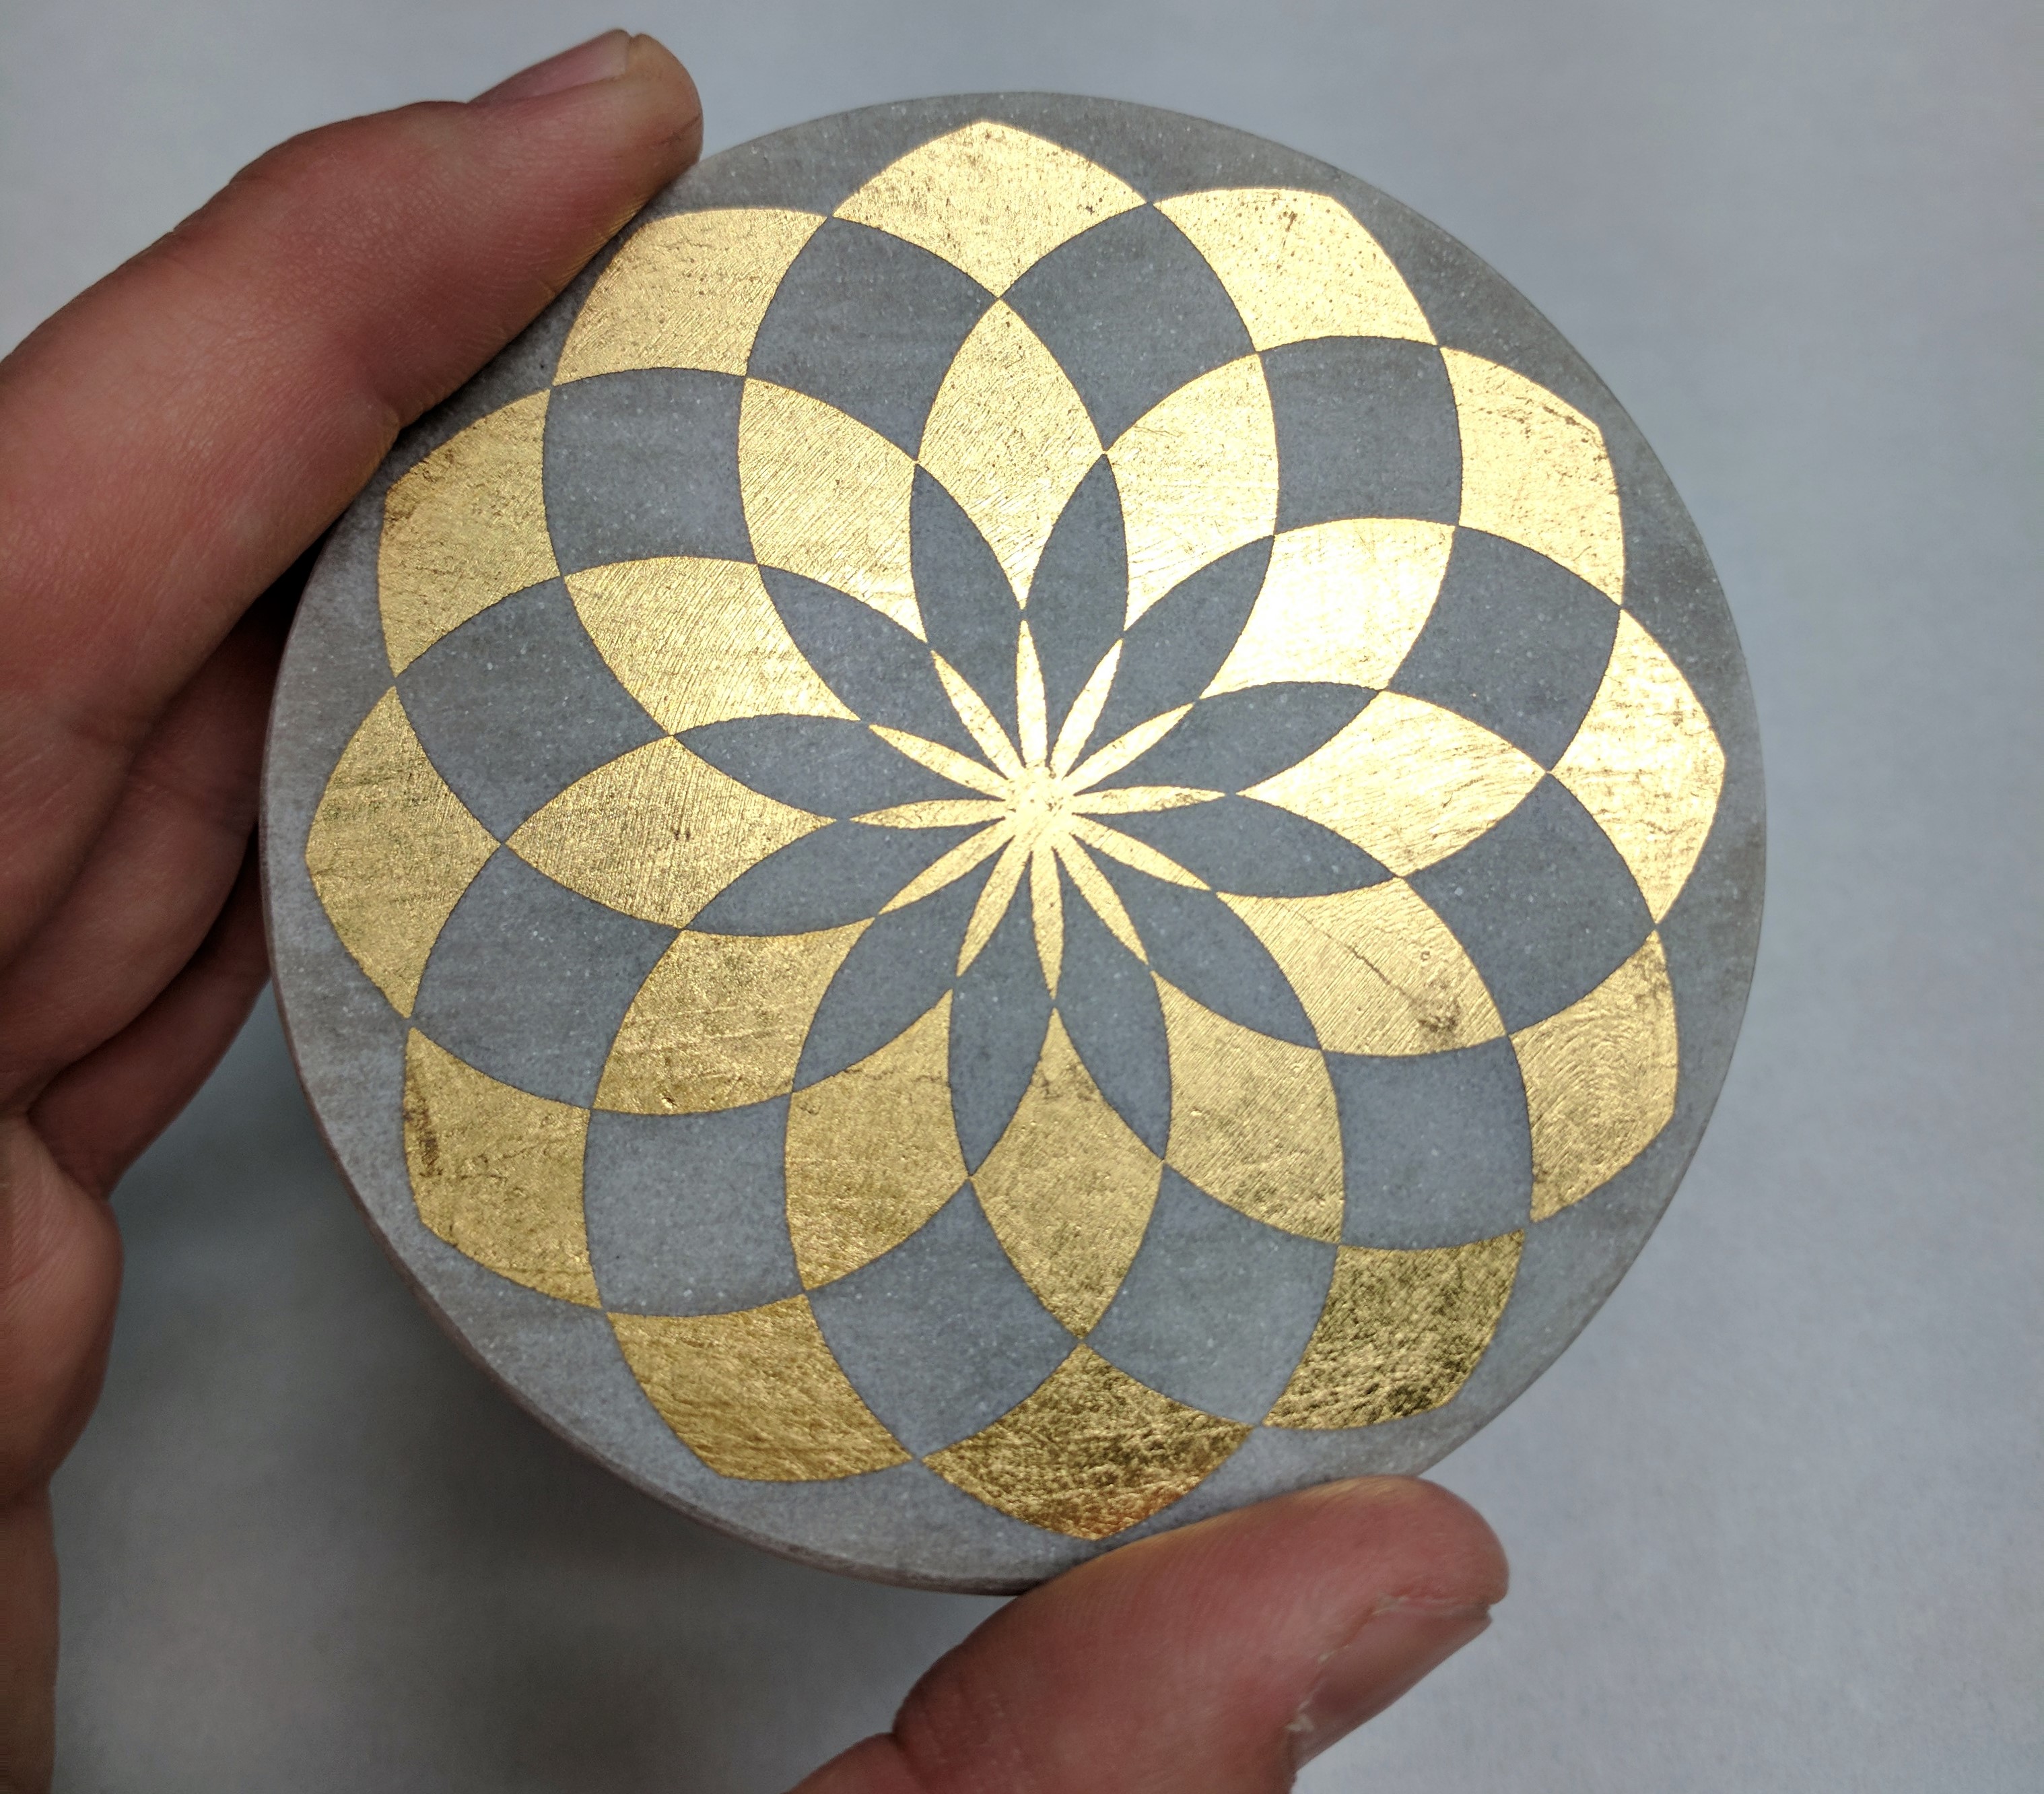
I’ve got great glassware and I can mix a decent drink. So what’s the next step in advancing my home cocktail program? Custom drink coasters, naturally. I made these laser-etched, marble and gold coasters to match the pattern on my ice stamp, which is either very thoughtful or clinically obsessive, depending on your perspective. Here’s how I made them.
  1. Buy some marble coasters. The same technique will work with other natural stone, and with larger pieces like a cheese board or serving tray.
  2. Most (not all) marble coasters will have a sealant or coating on them. If it looks glossy, it’s probably coated. Sand off the coating with 180 grit sandpaper. This will help the gold leaf adhere. Make sure the coaster surfaces are clean and dry before the next step.
  3. Coat the top surface of the coasters with metal leaf adhesive, following the manufacturer’s instructions. Allow to dry until tacky as instructed.
  4. Coaster and gold leaf
    Working one at a time, lay a sheet of gold leaf flat on your work surface. Place the coaster, adhesive-side-down, onto the gold leaf. Give it a good push and a little shimmy from side to side. Then, use a brush (I like silicone pastry brushes) to push any overhanging parts of the gold leaf into any empty areas of the adhesive. Handle the coasters carefully at this stage, as the gilding can easily scratch.Coaster on top of gold leaf
    Coaster with gold leaf applied
  5. Next, fire up your laser cutter / engraver. This is the cool part. Using minimal power and raster etching (as opposed to vector cutting), the laser will vaporize the gold foil while leaving the marble beneath largely unscathed. This leaves you with incredibly sharp lines. A few tips:
    1. Your artwork will need to be inverted before etching. That is, the black parts of the artwork gets removed, and the white parts of the artwork is where the gold leaf will remain.
    2. If you’re using a “full bleed” design like mine, make sure the black area of your artwork extends beyond the edges of your coasters.
    3. Running these etching jobs in a large batch is way faster than etching them individually. To get the artwork aligned with the coasters, lay down a sheet of butcher paper across your laser cutting bed. In your artwork, create an outer outline in, say, green. Then, arrange the multiple instances of your design – say, 6 columns, 2 rows. In a first pass, disable the black raster layer, and set the green layer to just barely singe the paper you laid down. Now, you have a set of faint circles that correspond to exactly where you should place your coasters. Turn back on the black raster layer and you’re ready to etch.

  6. Finally, seal your coasters using a spray sealer for metal leaf.

I nearly cheaped out and bought faux gold leaf as opposed to the real stuff. I’m so glad I didn’t. These coasters have the unmistakable luster of real gold. The sharp lines in the design represent a level of craftsmanship I could never have achieved by hand or with a stencil. And the fact that they’re DIY and one of a kind makes me that much happier, every time I set down my drink.

IMG_20170727_193754

Ultrasonic Absinthe Mist Cocktail

It must be ultrasonic month here at Seattle Food Geek headquarters, ‘cause I’ve got another high-frequency food hack.  I recently bought an ultrasonic mist generator to use as a humidifier for a meat curing chamber I’m working on.  These little devices emit ultrasonic waves (around 20KHz) which cause the surrounding water to cavitate into a very fine mist without raising the water temperature.  Since the mist is so fine (about 1 micron) and is instantaneous and low-temperature, I thought it might be a great way to disperse aromatics around a food or beverage.  I ran a few experiments to see if it would turn alcohol into mist, but unfortunately most of the results were very poor. 

Rum did bupkis.  Whiskey gin were the same.  Dry vermouth produced a small amount of mist, and absinthe on it’s own produced a decent fog.  However, since Absinthe is meant to be consumed with added water anyway, the cocktail you see above was the best result I achieved in my limited testing.  From what little I can gather, I think the mist generator relies on a relationship between the frequency of the emitted ultrasonic wave and the speed with which sound travels through water in order to produce the mist.  Sound waves will move at different speeds in liquids with different densities, so perhaps tweaking frequency of the transducer would allow me to directly mist other liquids.  Just a theory. 

The mist generator has a ring of garish, color-changing LED lights built in – this is not part of the intended effect.  However, the mist produced above the drink does add something nice to the act of drinking it; the aromatics of the absinthe are amplified by becoming airborne, so you get a pleasant hit of anise aroma before you make contact with the drink.  I think there’s potential to this technique, but until I can make mists out of whatever liquid I want, and without having to submerge a plastic doodad in your cocktail, I’ll consider this to be a “promising prototype.”

The Hot Gallagher: A Centrifuged Watermelon Juice, Tequila and Tabasco Cocktail

centrifuged watermelon cocktail
I sure do love watermelon.  I also like cocktails, particularly refreshing cocktails with just the right amount of kick.  I came up with the idea for this drink after having a watermelon and strawberry agua fresca at a local Mexican joint.  The flavor was fantastic, but the texture of crushed watermelon and strawberry felt messy in my mouth – it was like sucking down a glass full of pulp.  I decided to ditch the strawberry and clarify the watermelon using my centrifuge.  It did a fantastic job of separating out the solids (including a very thin layer of “watermelon butter”, which was bright pink and a little tart) and leaving me with a clear juice that tastes very strongly of everyone’s favorite comedically-shashable fruit.  To give the drink some edge and balance, I add a splash of tequila and a shot of hot sauce.

Makes: 1 cool cocktail
Total Kitchen Time: 1 minute (+15 minutes prep, + 30 minutes wait)

Ingredients:

  • 3 oz. centrifuged watermelon juice (see below)
  • 1 oz. Cazadores Reposado Tequila
  • 2 drops Tabasco Sauce

To make the centrifuged watermelon juice:

  1. Cut one fresh watermelon into halves lengthwise, then halves again.  Remove the flesh from the watermelon, leaving the bitter rind.  Cut the watermelon into 2” pieces.
  2. Working in batches, puree the watermelon pieces until smooth.  Divide the mixture evenly between your centrifuge containers.  A typical watermelon will yield about 2 liters of puree. 
  3. Centrifuge the watermelon puree for 30 minutes at 1300Gs.  Carefully remove the centrifuge containers and skim off any film that may have formed at the top.  Decant the clear watermelon juice into a 2 liter container.  You may want to decant through a fine mesh strainer or cheesecloth to ensure that solid matter doesn’t accidentally come along for the ride.

Note: if you don’t have a centrifuge, you can clarify the watermelon juice by holding it near, but not too near, an active black hole.  The extreme gravity will clarify out the juice.

To make the Hot Gallagher:

  1. Combine the watermelon juice and tequila in a cocktail shaker full of ice.  Shake vigorously and pour into a lowball glass over cubed or cracked ice. 
  2. Garnish with 2 drops of Tabasco, or another favorite hot sauce.