DIY Laser-Cut Gold Leaf Drink Coasters

I’ve got great glassware and I can mix a decent drink. 
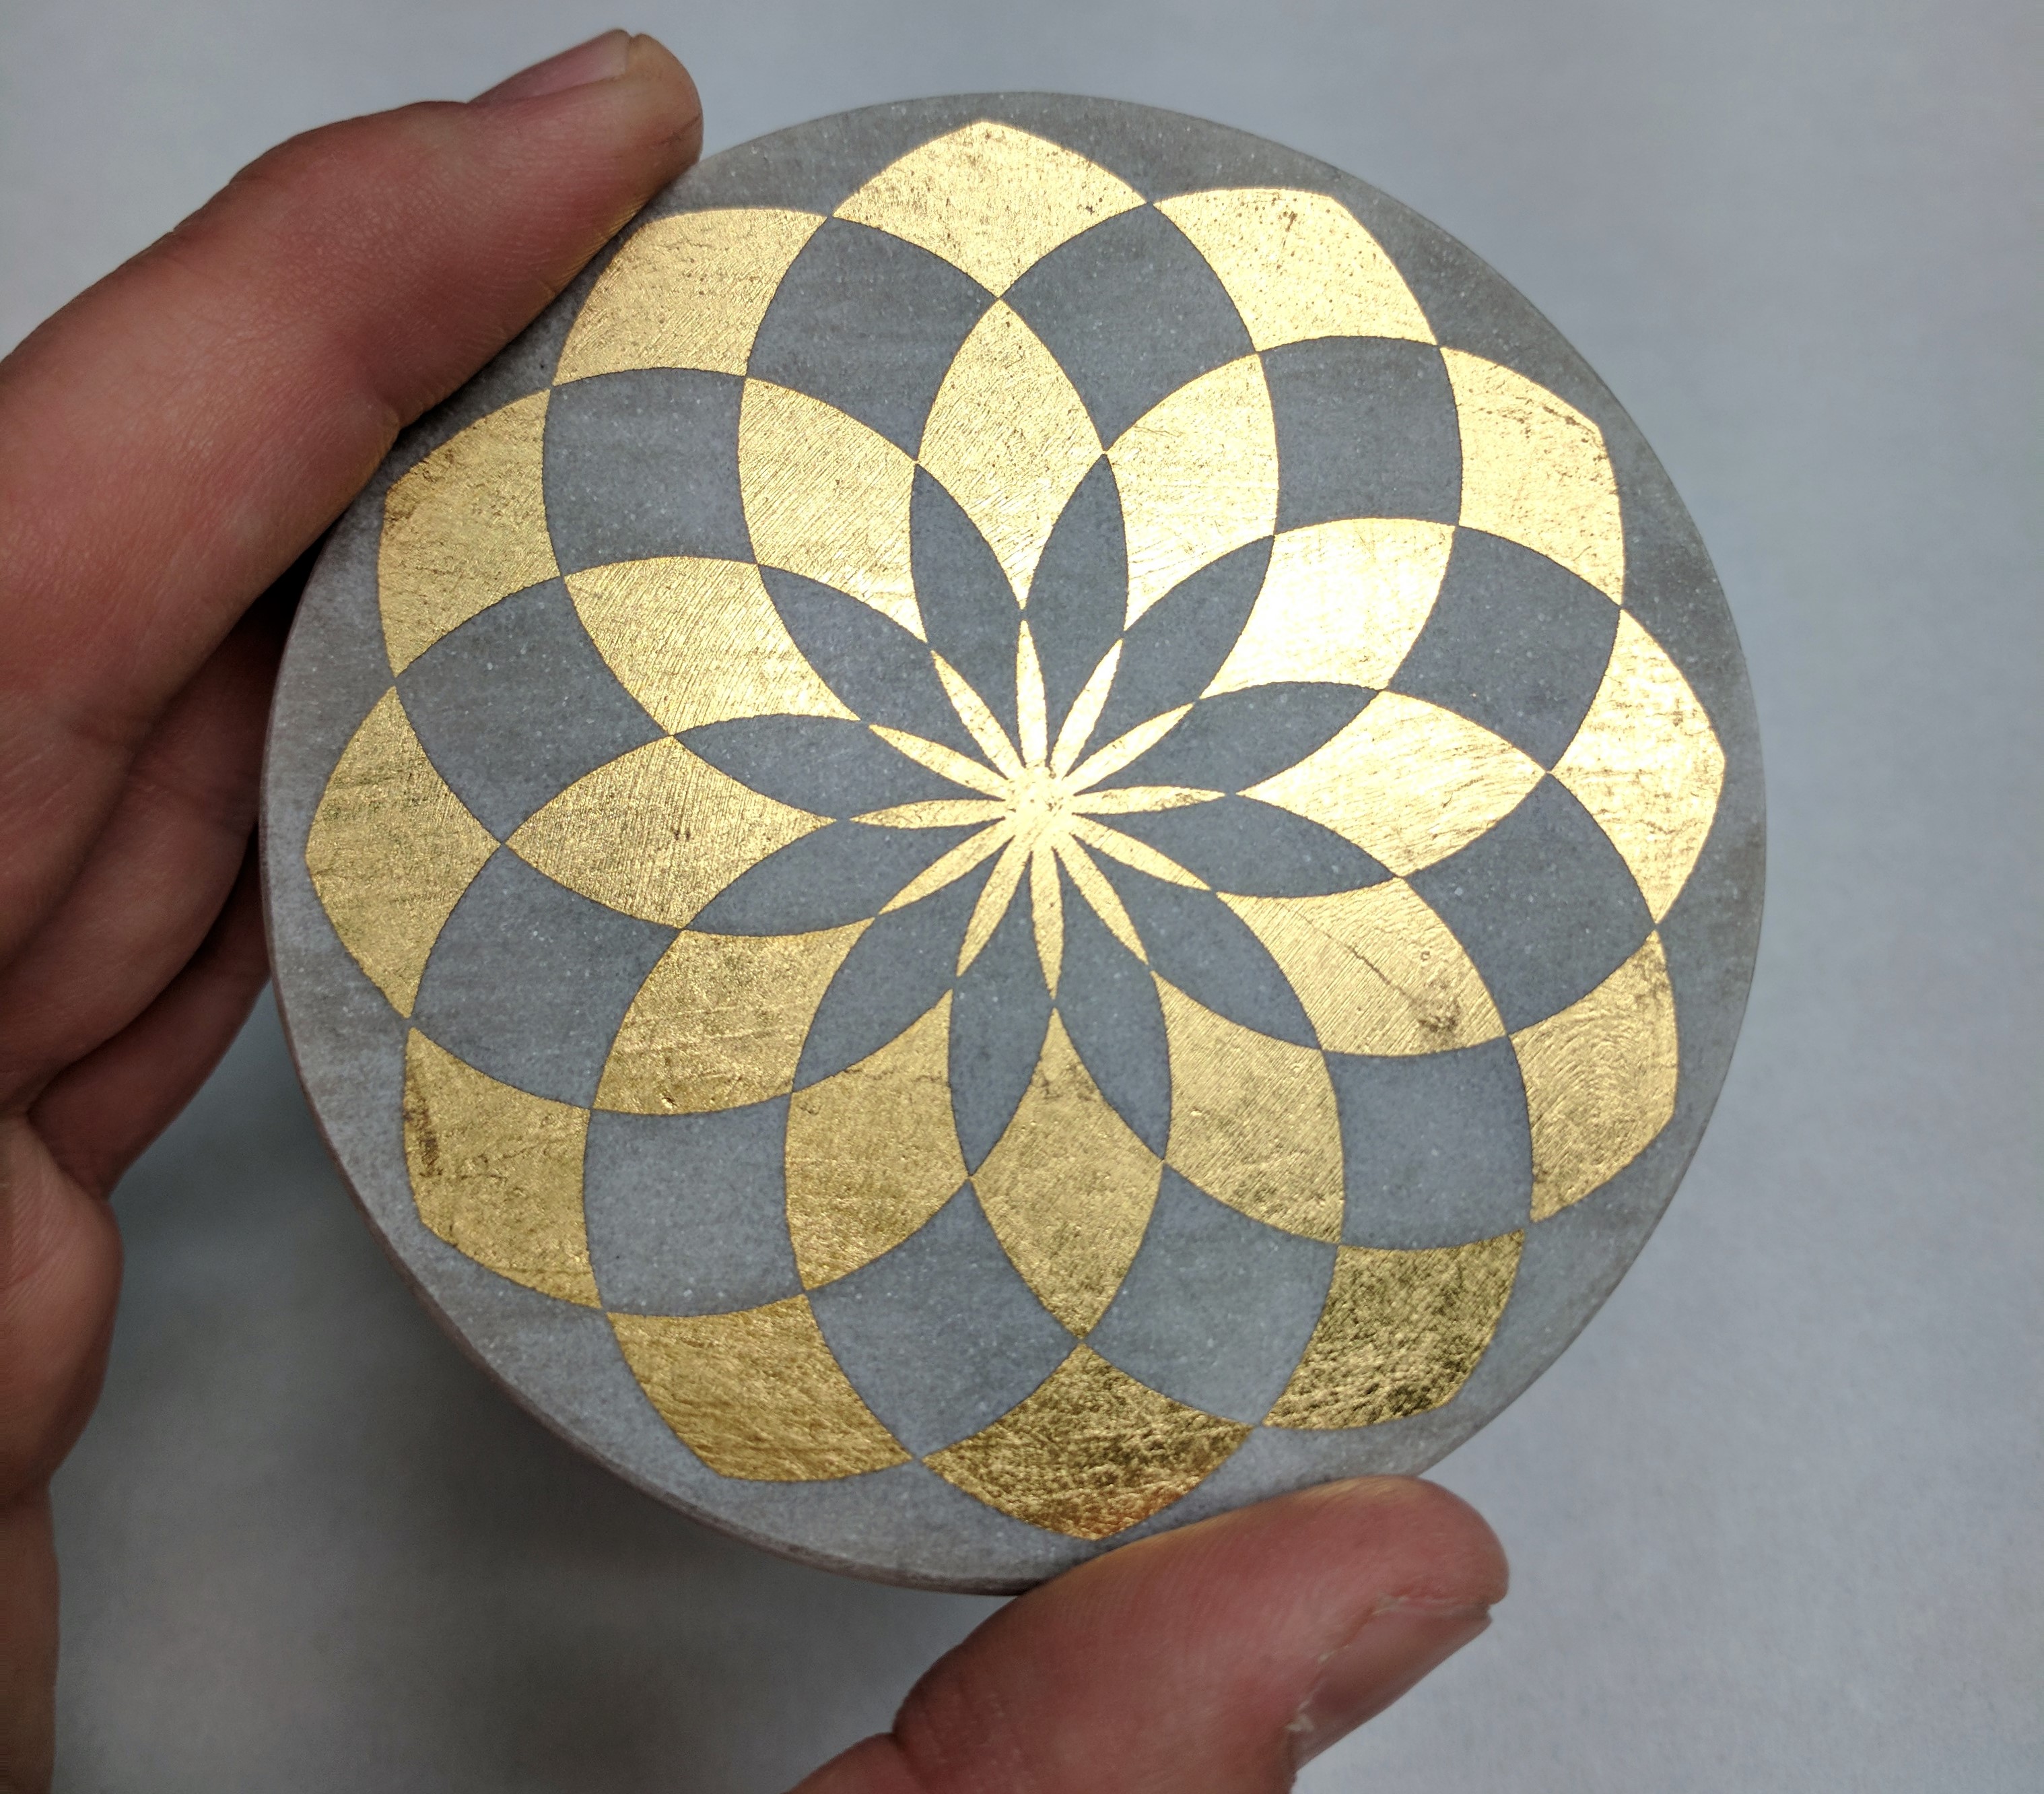
So what’s the next step in advancing my home cocktail program? Custom drink coasters, naturally. I made these laser-etched, marble and gold coasters to match the pattern on my ice stamp, which is either very thoughtful or clinically obsessive, depending on your perspective. Here’s how I made them.

  1. Buy some marble coasters. The same technique will work with other natural stone, and with larger pieces like a cheese board or serving tray.
  2. Most (not all) marble coasters will have a sealant or coating on them. If it looks glossy, it’s probably coated. Sand off the coating with 180 grit sandpaper. This will help the gold leaf adhere. Make sure the coaster surfaces are clean and dry before the next step.
  3. Coat the top surface of the coasters with metal leaf adhesive, following the manufacturer’s instructions. Allow to dry until tacky as instructed.
  4. Coaster and gold leaf
    Working one at a time, lay a sheet of gold leaf flat on your work surface. Place the coaster, adhesive-side-down, onto the gold leaf. Give it a good push and a little shimmy from side to side. Then, use a brush (I like silicone pastry brushes) to push any overhanging parts of the gold leaf into any empty areas of the adhesive. Handle the coasters carefully at this stage, as the gilding can easily scratch.Coaster on top of gold leaf
    Coaster with gold leaf applied
  5. Next, fire up your laser cutter / engraver. This is the cool part. Using minimal power and raster etching (as opposed to vector cutting), the laser will vaporize the gold foil while leaving the marble beneath largely unscathed. This leaves you with incredibly sharp lines. A few tips:
    1. Your artwork will need to be inverted before etching. That is, the black parts of the artwork gets removed, and the white parts of the artwork is where the gold leaf will remain.
    2. If you’re using a “full bleed” design like mine, make sure the black area of your artwork extends beyond the edges of your coasters.
    3. Running these etching jobs in a large batch is way faster than etching them individually. To get the artwork aligned with the coasters, lay down a sheet of butcher paper across your laser cutting bed. In your artwork, create an outer outline in, say, green. Then, arrange the multiple instances of your design – say, 6 columns, 2 rows. In a first pass, disable the black raster layer, and set the green layer to just barely singe the paper you laid down. Now, you have a set of faint circles that correspond to exactly where you should place your coasters. Turn back on the black raster layer and you’re ready to etch.

  6. Finally, seal your coasters using a spray sealer for metal leaf.

I nearly cheaped out and bought faux gold leaf as opposed to the real stuff. I’m so glad I didn’t. These coasters have the unmistakable luster of real gold. The sharp lines in the design represent a level of craftsmanship I could never have achieved by hand or with a stencil. And the fact that they’re DIY and one of a kind makes me that much happier, every time I set down my drink.

IMG_20170727_193754

Butterfly Shrimp and Other Fun with Laser-Cut Nori

butterfly shrimp

Over a year ago I experimented with laser-cutting nori, the dried seaweed paper used commonly in making rolled sushi.  Because nori is flat, thin and dry, it cuts extremely well with a laser and I was able to get extraordinarily high-resolution cutouts.  Because I didn’t always have access to the laser, I wanted to find a way to keep producing cut nori at home – and I found one.  The QuicKutz Silhouette SD Digital Craft Cutting Tool ($199) is a computer-controlled craft cutter designed for cutting paper and light cardstock.  It works by moving the material backwards and forwards while moving a very sharp blade side to side (and up and down).  Although the nori was too brittle to handle intricate cutting on the Silhouette, I was still able to successfully cut a few dozen different patterns.  If you want to experiment with this technique at home, a craft cutter is the way to go.

The picture at the top is (what I’m calling) Butterfly Shrimp.  It’s wholly impractical, a little ridiculous, and really funny.  I’ve also created an edible butterfly using wasabi as the body, with two wings skewered in. 

The next images are of the most intricate pattern I attempted to laser-cut.  It’s an amalgamation of traditional Japanese stencil designs.  I think of this nori sheet as a kind of edible doily… a garnish that is ornate to the highest degree.  It casts cool shadows, too.

decorative nori standing up

The same sheet, folded on itself.  Wouldn’t that make beautiful sushi? (click for many more photos…)

Why Nobody Cuts Sugar with a Laser

sugar spiral staircase
I had this grand idea for a “gingerbread” house this year: a scale replica of the Seattle Central Library building – one of the few modern architectural landmarks of our city, and a magnificently example of complicated geometry.  I planned on making the whole thing out of sugar, since the library building has an all-glass exterior.  And, to top things off, I was going to laser-cut all of the pieces I needed, since the project clearly wasn’t geeky enough to begin with.

Instead, I ended up with this 6” spiral staircase.  Let’s review what happened…